


When we moved into our home one year ago, we immediately put on our Home Makeover List to build a retaining wall in the front yard. Well with little nugget now on the way we've decided to try and knock out as many projects as we can this summer before we push it off for...say another ten years, while babies become the priority.
We had planned on watching ads and seeing where we could find the best deals throughout the summer. Well, Memorial Day weekend Lowe's happened to be running a great sale on the exact retaining wall blocks we had been looking at so we jumped on it! We read different tutorials online about how to build retaining walls and then just went with our gut and started destroying and building. Well mr g did. This pregnant lady sat in a camping chair and supervised all weekend and shoveled dirt when I could. I am so excited with how it turned out and love driving up to our home after work each night now to a welcoming, clean, classy looking front garden space. I love the difference!
Here's how we did it...
Supplies
Sand
Retaining Wall Blocks (we bought 100 of these ones from Lowes and knew we could return what we didn't use)
Concrete adhesive (optional)
Tools
Sledgehammer (if needed)
Level
String and stakes
Shovel

Directions
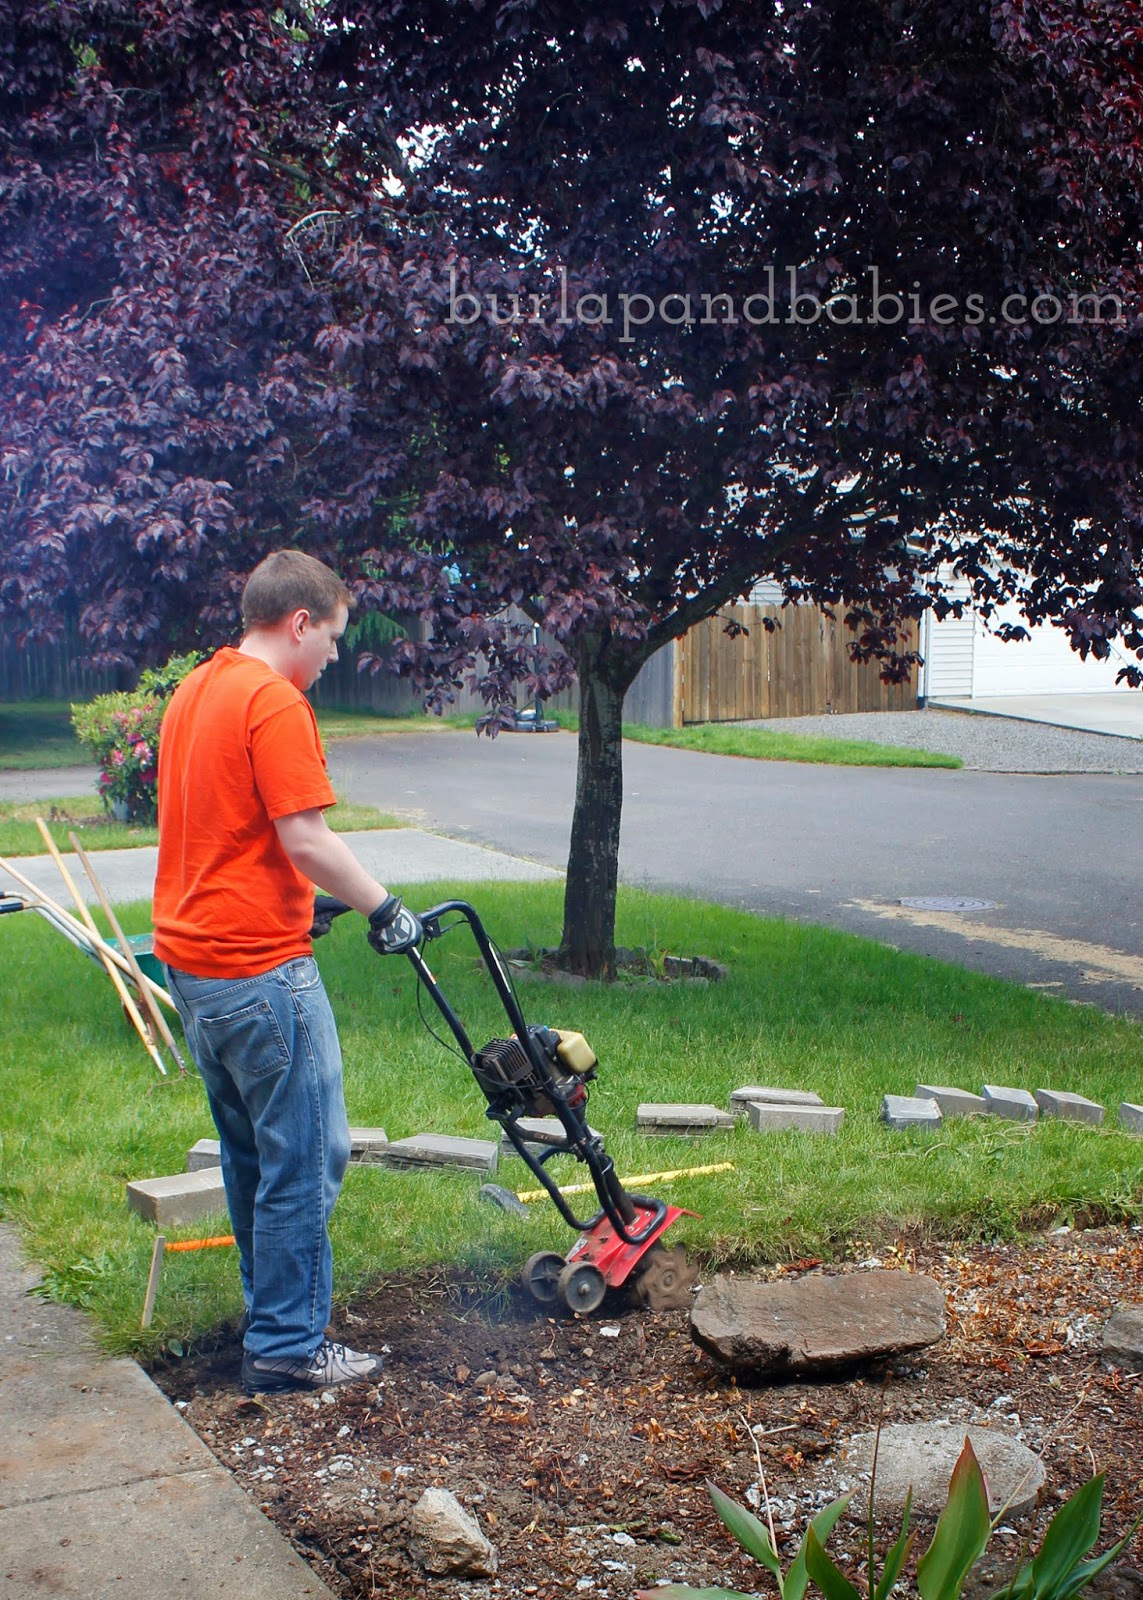
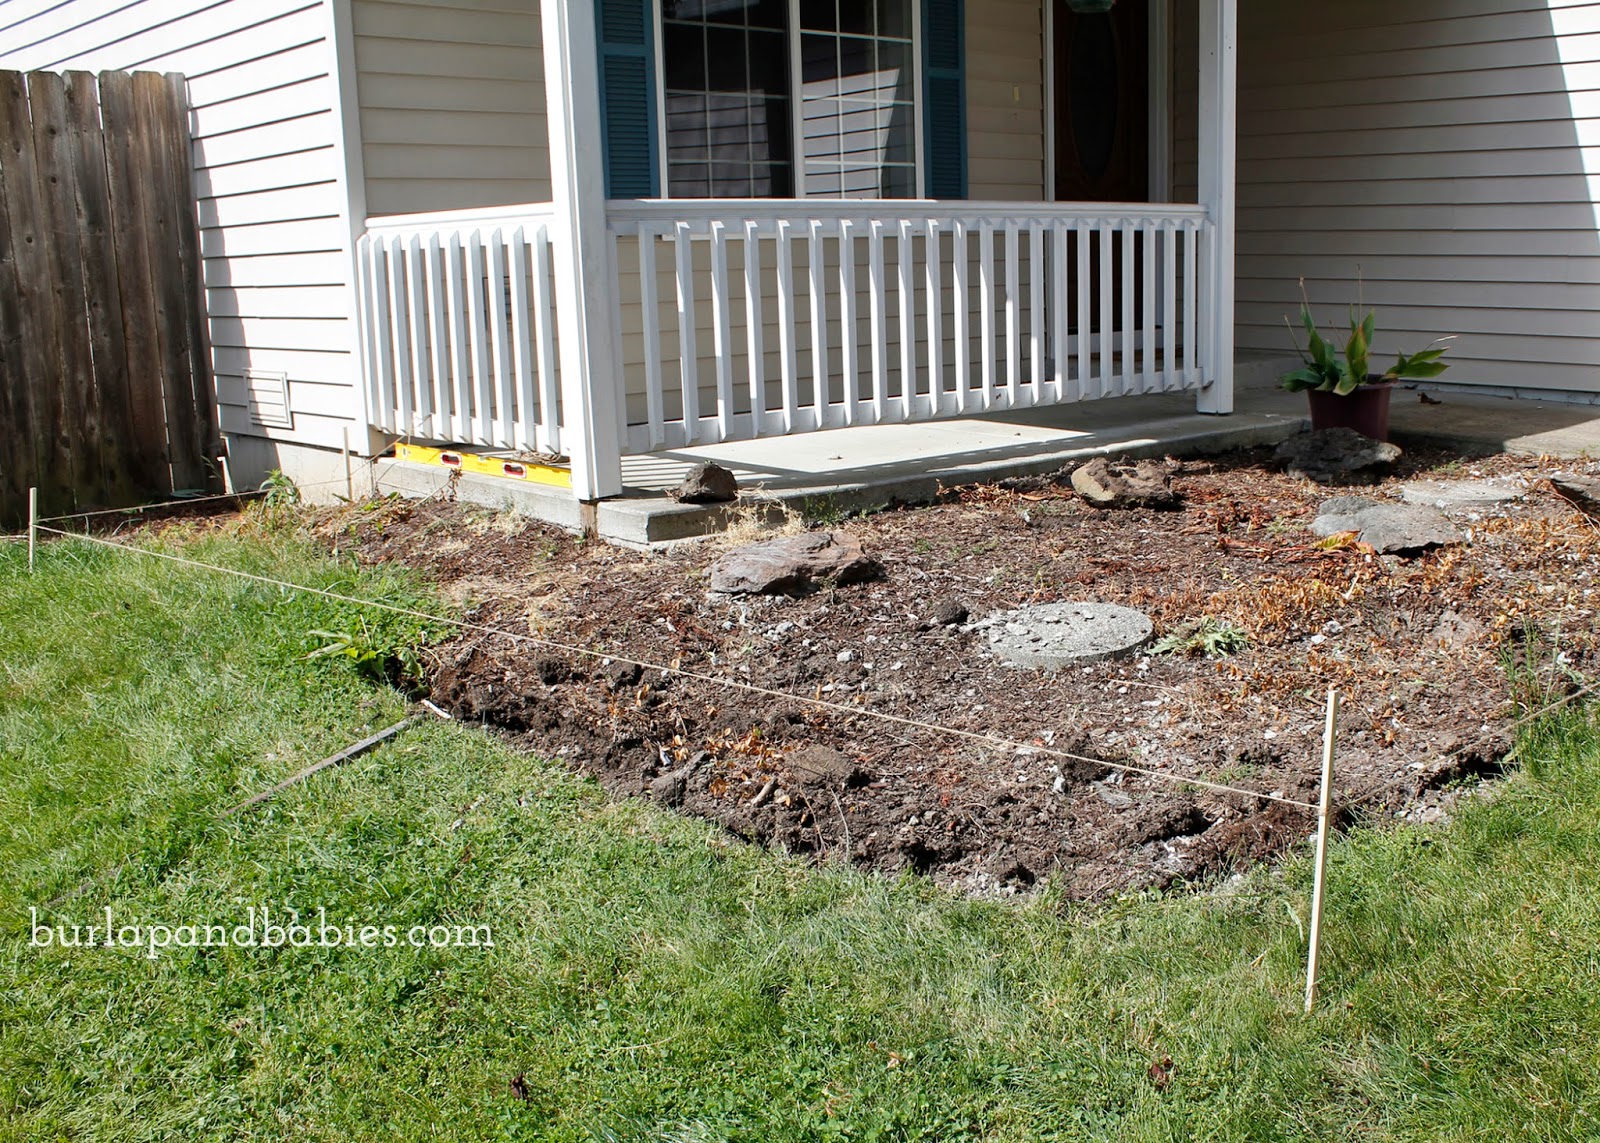
When our housing development was built 16 years ago I think they bought the cheapest edging stones possible and concreted them into the ground. So before we could even start building, poor mr g had to break it all apart and then get all the little concrete pieces out of our garden bed. Hopefully you wont have to do that before you can start building your wall! This was what it looked like after he finished destroying the concrete.

After that, then we placed the 22 pound stones around the garden bed. We decided we wanted to make the garden area a little larger than it currently was so once we had the layout then it was time to dig out the trench for the stones to go. You'll want to dig deep enough so that the stones are between the dirt and grass edge rather than just sitting on top. This will give your wall a more sturdy base. We actually used a small rototiller to help break up the dirt because man the dirt was tough and helped save a lot of time for digging the trench deep enough.

Once the trench was dug, we used some wood scraps we had in the garage and crafting twine (of course, because what else would a crafter have quickly on hand to use) and mapped out how many stones high we would need for the wall to be level. From there we measured down how far the bottom row of stones needed to go.
This is the best picture I have to explain it, but if you are building the wall on a slope, you'll need to measure out where the stones will go so that your wall will be level. As you can see, the stones closest to the walkway only have two levels. Then we had to make a step down where we had three levels, and then again around the tallest point we had to step down again for four tall.


After that, go crazy with your level and put down your base row making sure each stone is level along the whole way. Each stone needs to be level side to side and front to back. This may seem tedious but it's better to level out as you go rather than having to redo it once you finish if they don't even out. If you choose to use concrete adhesive, be sure to have it ready once you start stacking to hold it all in place. Honestly, we didn't use any to cut down on costs and we haven't had any problems yet. Once we filled the bed with soil it helped to hold the wall in place and make it secure.

For less than $200 and a few days of grunt labor, I'd say this was a super diy success. I am so very excited with how this wall turned out and how drastic of a change it made. First impressions are everything and I'd say this majorly upped our curb appeal when people come visit our home for the first time.
What diy home projects are on your summer to do list? I'd love to hear about your list in the comments below.


That retaining wall looks awesome! Great job!
ReplyDeleteThanks!! I love it too. :)
Deleteif i ever get blessed with a big house, i'm calling you for sure.... :D
ReplyDeleteDefinitely do! I love doing it and making a house a home. :)
DeleteNice job! Would love if you came and shared you posts on the Merry Monday Linky Party. We go live Sundays at 6pm PST till Thursday 9pm PST.
ReplyDeleteWill do! Thanks for the invite.
Deletethis wall looks great!! You can come and do one in my garden any time you like
ReplyDeleteLove the bricks ... looks like hand laid bricks or cut rock. Really made a great looking planting bed. Great job.
ReplyDeleteAudrey Z. @ Timeless Treasures
Awesome! Love the before and after photos...very inspiring!
ReplyDelete